Environment
- Cb Protection 6.x - 8.x
- All supported Mac OS X and Linux
Objective
- This document provides information on how to use the "b9cli" command.
Resolution
- Open a command terminal
- Change directory to the location of the b9cli file. Below are the default location:
- Mac OS X: /Applications/Bit9/Tools
- cd /Applications/Bit9/Tools
- Linux: /opt/bit9/bin
- cd /opt/bit9/bin
- Type "./b9cli" to see all the available command options that does not require CLI or Global password. The "./" is to indicate relative path.
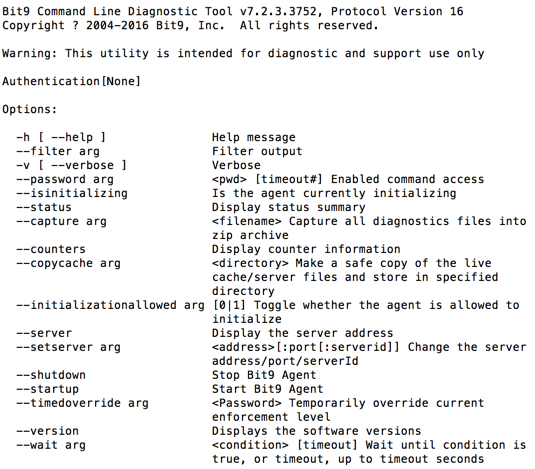
- Syntax: ./b9cli --<option> <parameter>
- Example:
./b9cli --server
./b9cli --capture /User/username/Desktop/MyDiagnosticLogs.zip
./b9cli --hash sha256 /User/username/Desktop/Temp/Testfile.exe
./b9cli --password ABCD-EFGH-IJKL-MNOP
- For additional command options, you will need to elevate your permission using the CLI or Global password. Once it's elevated and you repeat step 3, you'll see a longer list of available command options.
Related Content
How to enable debugging mode using "b9cli" command


